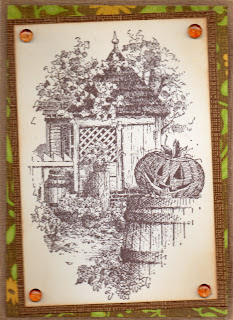
Saturday, December 15, 2012

Day 2 of Winter Holiday Fun

Good Morning Everyone!

Here is the second creation in my Holiday Fun blog event.

This creations is using a stamp from Stamping Bella and paper from Core'dinations and DCWV. This is an A2 card measuring 4"x5.5".

Instructions-
  • Cut a piece of Core'dinations White Wash Grandpa's truck cardstock to 4x5.5" and 2.75"x2.75"
  • Cut piece of pattern paper to 3.75"x5.25". (My pattern paper is from DCWV 2011 Holiday Stack.)
  • Cut a piece of smooth white cardstock to 2.5"x2.5"
  • Using Tuxedo Black ink from Memento ink and stamp image on white cardstock
  • Color image using Copic Markers
  • Use Fiskers Heritage punch to cut the corners of the image cardstock and coordinating sized Core'dinations
  • Ink edges of image with Tea Dyed Distress Ink by Tim Holtz
  • Adhere image to cardstock and pattern paper to card stock
  • Adhere image to pattern paper
  • attach ribbon and bow
  • Adhere card front to base measuring 8"x5.5" folded in half
  • Write "Wishing you many 'Cups of Good Cheer' this season" on the inside of card. (Lyric from "We Wish You a Merry Christmas")
Today's challenge

Use a holiday song lyric in your project. When posting your project please state the song title. Please link through the comments section.

Thursday, December 13, 2012

Let the Winter and Holiday Fun Begin!

Hello Everyone and Welcome!

 Last night my boyfriend and I snuggled up to watch "A Christmas Carol" with Jim Carey. Wow, there were some parts of the movie that were not very kid friendly for a Disney movie. I was looking all over the box for Tim Burton's name, but I guess he didn't work on this film. I love who Jim is able to project and change his voice. His voice just carries the emotion and energy of the Scrooge character so well. It was very good and followed the original work by Charles Dickens very well.

On another note...

Today kicks off my 12 Days of Christmas Blog challenge. Guess what? I'm even starting on time! Today's challenge is a Joy-Fold Card.

Here is a picture

The card measures 4"x5.5"

Materials:
  • Core'dinations Vintage Cardstock in Kisses and Clover Patch
  • SEI Holiday Traditions Dreams of Wonder Cardstock
  • (3) square metallic green brads
  • Smooth white paper from the Paper Loft
  • Tuxedo Black Memento Ink pad
  • Adhesieve
  • Outlines small and medium snowflake
  • boner folder
  • paper trimmer
Instructions
  • Cut a piece of the Clover Patch to 4x8.25" score and fold at 2.75"
  • Cut a piece of the Clover Patch to 2.25x7.5" score and fold at 3.75"
  • Cut 2 pieces of the Clover patch to 3x3" and adhere back to back
  • Cut a piece of the Clover patch to 1.75x1.75
  • Cut a piece of Kisses at 2.75x2.75" and one at 1.5x1.5
  • Cut a piece of smooth white to 3.5x2"
  • Cute a piece of pattern paper to 3.75x5.25", and (2) pieces 3.75x2.5"
  • Stamp images on smooth white and trim around the edges
 
  • Adhere images to coordinating sized cardstock
  • Punch holes and secure brads in lower right hand corner of larger panel of pattern paper. Adhere panel to inside of larger green cardstock
  • Adhere one of the smaller panels of pattern paper to the flap of card base. Reverse pattern for inside of flap. 
  • Adhere folded strip of green cardstock so that the flap of the card base is sandwiched between. Center the strip on card base before pressing into place
  • Adhere smooth white strip to the front of the strip flap then adhere medium snowflake layers to the strip flap
  • Adhere small snowflake to inside of the card
HERE is the challenge-
Create a Joy Fold card using snowflakes. The snowflakes can be part of the paper, stamped, or both. Be creative and link your card through the comments (meaning put you blog/flicker/etc. address in the comment) Deadline is December 31st 2012.

Tuesday, December 11, 2012

Fun Things in the Works

Hello Crafting World!

Only a few days left until the 12 Days of Christmas online fun. I plan on posting a variety of cards, scrapbook pages and other projects to spur on your own holiday creativity. All the fun starts December 13th. Remember you can join in the fun by linking your projects through the comments section. As the date gets closer I will post more information.....


I'm working on new posts for the Technique page too.  Joy-fold cards, alcohol ink and more

On another note-

An exciting opportunity has presented itself. On December 26th, I will be at Steele Hill Resort in Belmont NH from 1pm to 3pm. I will be giving paper crafting lessons, selling kits (scrapbook and card), scrapbook layouts and greeting cards. Here is a link to the resort.....just click here

Thanks for stopping by,

T

Wednesday, November 28, 2012

Core'dinations Online Holiday Crop-Lydia's Sketch Challenge

Good Evening Everyone in Blog land!

Whew! I finally found the perfect pictures to finish Lydia's sketch Challenge for the Online Core'dinations Holiday Crop. As I was going through my pictures I realized that I don't have many pictures of winter events. (Memo to self-take more pictures in winter. :) )

If you haven't heard of the Core'dinations Online Crop here is the link.
This challenge can be found here.

On to the final project....

Here is the sketch that Lydia gave as the challenge.


Unfortunately my camera doesn't work at the moment so here is the layout in scanned pieces.


I used paper from the White Wash collection. the border around the page is punched using a Fishers punch. I then sanded the edges to add a little more blue color to the edges. The pattern paper is from the 2012 DCWV Stack. I trimmed the pattern paper to 11x11".


I created the center divider using two punches from Fiskers and flipping one strip color side up.


The Snowflake in the corner is crocheted by me. The ribbon is from Michael's.

Thanks for stopping by and I hope you feel inspired by this layout.
Toni


Tuesday, November 27, 2012

Core'dinations Online Holiday Crop-Margie's Challenge

Good Afternoon Everyone!

As you may know I'm participating in the online Core'dination Holiday Crop. Today I have finished Margie's gift bag challenge using die cuts.

Here is a picture of the final project.

 To create the die cut light bulbs, I used Core'dination's Vintage papers and my Cricut. The lights are from the Christmas Cheer cartridge.

I used the "Blackout" function to cut the base in the darker color. Then I cut the first layer using a lighter color.


The cap of the light bulb is cut using the shift key. I then "strung" them across the front of the bag using a piece of green ribbon.


2012 Holiday Gift Bag-Winter Landscape

Good Morning Everyone,

It's a busy day for me here in New Hampshire. Outside it feels like Old Man Winter is gearing up for a little snow. This inspired me to create a winter landscape gift bag.

 I used paper from the Core'dinations Chocolate box collection to create the trees and sky. The trees are cut at 3" and 3.5" using the Christmas Cheer Cartridge for Cricut. The snow landscape is embossed using the Swiss Dots folder for the Cuttlebug.


The ribbon is from Michael's.


 I found the snowflake jewels at JoAnn's last year.


Sunday, November 25, 2012

Core'dinations Holiday Online Crop--Jennifer's Challenge

Well it's Sunday, which means Day 2 of the Core'dinations Holiday Online Crop

Today I have a matching gift bag and tag for Jennifer's Challenge.


 I used paper from the Vintage and White Wash Collection. I cut the snowflake embellishments from the Winter Woodland Cricut cartridge at 2.5"

 For the tags I used White Wash cardstock as a base and embossed them in the Cuttlebug with the Swiss Dots and Birds and Swirls folder.

Plus I made a card to go with the bad and tags.


Thanks Jennifer for the Challenge.

Saturday, November 24, 2012

Core'dinations Holiday Online Crop-Debbie's Challenge

Hello Everyone,

Ok I think I'm on a role with the Core'dination's Holiday Crop challenges. Here is the link to the Core'dinations website and to the Event page of Facebook


Here is my entry for Debbie's challenge:


I took some May Arts ribbon I had on hand and created a herringbone pattern. I then framed the ribbon pattern with a piece of silver paper and adhered it to the front of the card base. The base is 3"x 11". It is scored at .75" and 6". I pierced the .75" piece of paper and secured the three brads.


Thanks for stopping by. Please leave a comment.


Core'dinations Holiday Crop-Leica's Challenge

Good Evening Everyone!

Today is the first day of Core'dination's week long Holiday Online Crop. Here is the link to the Core'dinations website and to the Event page of Facebook

So here is my project for Leica's challenge:


 I used Core'dination's White Wash collection and my Holly Ribbon 5x7" Cuttlebug folder to create the large background on the gift bag (embossed piece measures 5x7" and is mounted on 5.25x7.25".


The Holly is cut using the Winter Woodland cartridge from Cricut at 3.5 inches. I cut this embellishment using the Core'dinations Vintage Collection. The lighter green leaf (Kilt Green) is embossed using the branches folder for the Cuttlebug. The berries (Kisses) are embossed with the Swiss dots folder.


 The sentiment is mounted on a piece of White Wash Barn Siding color side up (3.25x3.25").


Thanks for checking out my creation. I hope you are able to play along by checking out the links above.

Monday, November 19, 2012

Getting Ready for the Holiday Hard Core Crafter

Hello Everyone,

So Core'dinations, one of my favorite paper crafting lines, is preparing challenges for a second Hard Core Online Crop! This time it's holiday themed. I'm so excited! I have been organizing my Core'dinations paper and gathering all my holiday embellishments together. Starting this coming Saturday the designers are going to be posting the challenges.

Here is the link to the Holiday Hard Core Crop Facebook page (Click the image below);

I hope everyone has a safe and happy Thanksgiving. Plus, I hope to see you online during the Holiday Hard Core Crop.


Tuesday, November 13, 2012

Copic Tutorial-"Merry Christmas" Cat Card

Good Morning Blog Land!

I lot of things are in the works for the up coming 25 Days of Christmas. Hopefully life will work with me this time, unlike what happen with the 13 Days of Halloween. I am still going to post the projects from that time frame.

Anyway, here is a card that I have been working on using Copic markers. Copic markers are a great tool for coloring life-like images. The quality of the ink and blend-ability is unmatched. Please check out my other Copic coloring tutorials.

The overall card is very simple. The focus is on the Copic coloring of the image. I used W0, W1, W3, YR31, YR23, Y28, Y15, G05, G17, R46, R00, and the Colorless Bender to color the image.  I used new paper from Bazzill and S.E.I.

Here is a video of the coloring and card assembly.


There is a kit available in my eBay store. Just click the link above.

Thanks for stopping by! Please leave a comment. 


Thursday, October 25, 2012

13 Days of Halloween-Day 2

Good Morning World!

It's warm and sunny here in New Hampshire. I love warm Autumn days. Today I have a vintage looking Autumn card that is super simple to create.


I used paper from the 2011 Fall/Halloween stack by DCWV and some Core'dinations Vintage cardstock to create the card. The image is stamped using Memento Rich Cocoa ink and distressed around the edges using Tea Dye ink by Ranger. The image is called "Colonial Fall" and is made by Impression Obsession.

I love how this card turned out. It's warm tones reminds me of Autumn joys from my childhood.

There are two card kits and a set of six (6) finished cards available for purchase in my eBay store. Just click the tab above.

Video:

Challenge: Today's challenge is to create a project that uses the vintage feel. It can be a card, scrapbook page or a piece of altered art. To enter your creation, just post your blog address where I can find the creation in the comments below by November 1st.

Thanks for stopping by.

Friday, October 19, 2012

13 Days of Halloween-Day 1

Hello Everyone,

I do apologize for not having this post up on the blog yesterday. I was rear-ended two weeks ago and I'm still recovering.

Today's challenge (or, well, yesterday's challenge) is to use Core'dinations Black Magic paper and pumpkin images to create a card, altered art item or scrapbook page. To enter simple leave your name and blog address where the image is posted in the comment section below. I can't wait to see your creations!


Here is an example-


Materials: 

  • (1) 12x12 sheet of Core'dinations Black Magic Warlock
  • Stamping Up Halloween Smiles Stamp Set
  • (1) 8.5"x11" sheet of ivory Copic approved cardstock
  • Memento Tuxedo Black Ink pad
  • Cuttlebug Candy Cane embossing folder
  • Halloween Dew Drops
  • Orange with black poka-dot ribbon
  • adhesive (runner and Zots)
  • sandpaper or sanding tool
  •  Cuttlebug with (1) A plate and (2) B plates
  • Copic Markers-N0, N3, N6, C7, YR15, Y38, E59, E33, YG95, G99
Instructions:
  1. Cut a piece of the Warlock to 4.25"x5.5", one piece at 4x5.25"and one piece to 3x3.25"
  2. Cut a piece of the ivory cardstock to 8.5x5.5" and fold in half-creating a 4.25x5.5 card base
  3. Cut a piece of ivory cardstock to 2.75x3" and stamp image from Halloween Smiles using Memento ink.
  4. Color image with Copic markers as desired.
  5. Place 4x5.25" piece of Warlock in embossing folder so that the black side is facing up.
  6. Run embossing folder through Cuttlebug
  7. Remove cardstock from folder and sand the the black side exposing the orange color underneath.
  8. Adhere larger piece of Warlock cardstock to card base so that the orange is face up. 
  9. Using the "cheater" or "Saver" method adhere a piece of ribbon to the left side of the embossed cardstock about .5" in from the edge
  10. Adhere Embossed cardstock to center of card base
  11. Adhere stamped and colored image to orange side of smaller Warlock and adhere to the card front
  12. Adhere three Dew Drops using Zots 
  13. Enjoy.


Thursday, September 20, 2012

Steampunk Banner Using G45 and the Cricut

Good Morning Everyone,

Above is the Steampunk Version of a Halloween banner I saw on Xyron's Facebook page a few weeks ago. I love the original banner. So I decided to first make my own Halloween version then I decided to create a Steampunk version. I used paper from Graphic 45's Steampunk Debutante collection along with cardstock from Core'dinations. The keys and hot air balloon are from the Victorian Romance Cricut Cartridge.


The quote is from Edger Allen Poe; one of my favorite authors.


Here is a picture of the original banner I saw on Facebook.

I thought it was very cute, and something I could create with my Cricut and the Happy Hauntings cartridge. So here is a picture of my version of the Halloween banner.

I used paper from Die Cuts with a View and various embellishments I had in my brad and rub-on drawers. The pattern papers are inked with Walnut Stain Distress ink by Tim Holtz.

I hope you find this inspiring and create your own version of the banner.

Thanks for stopping by!

Thursday, September 13, 2012

Sassy Studio Designs Challege for September 13th 2012

Good Afternoon Everyone!

I'm very excited to submit my first entry in the Sassy Studio Designs Challenges. This week was a sketch challenge.

Here is a picture of the sketch:


Here is my take on the sketch:


I decided to use the SSD Steampunk Vivian image. I used paper from Graphic 45's Steampunk Debutante, Core'dinations Vintage Collection, Copic Markers and Dew Drops. The card measures 5.25 square and is distressed with Tim Holtz Tea Dyed ink.

I hope you like it. Please leave a comment.

Thanks for stopping by!

Wednesday, September 5, 2012

"Master, the plans."- Halloween and Christmas on the Brain

One of my all time favorite movies is The Nightmare Before Christmas. What better way to merge two great holidays into one movie. Plus, it's a Tim Burton film. (Love him!) I really enjoy the characters and how they learn about the spirit of giving. They also learn that "the grass is not always greener on the other side/holiday."

After watching this movie (third time this week), I started to plan out up coming blog/YouTube events to get the creative juices flowing. Here is a brief outline of the upcoming events.


Event One- 13 Days of Halloween starting October 18th (my birthday)
  • Each day will have a challenge based on products, movies, characters, colors and so much more.
  • If you participate in the challenges, you become eligible for a prize package. I will choose five winners. The winners will receive a prize package containing some of my favorite things from the paper crafting world. 
  • All entries must be received by November 1st at 12:00am EST (Think about it, if you participate in all 13 challenges, that's 13 entries.) 
Event Two-12 or 25 Day of Winter/Christmas starting December 1st.
  • Each day will have a challenge based on products, movies, characters, colors and so much more. 
  • If you participate in the challenges, you become eligible for a prize package. I will choose five winners. The winners will receive a prize package containing some of my favorite things from the paper crafting world.  
  • All entries must be received by December 31st at 12:00am EST (Extra time to participate due to the holiday season :) ) 

Tuesday, September 4, 2012

50, 100, and More

Hello Everyone,

I want to give away a prize pack full of my favorite paper crafting supplies. However, in order to do this I need fifty subscribers. Then I will randomly pull a ran. Wait! I'm not done. When there are 100 subscribers I will pull another name. So, spread the word about Blu_Butterfly Creations for your chance to win.

Thanks for stopping by
Toni

Wednesday, August 29, 2012

G45 Botanicabella Altered Notebook

I absolutely adore Graphic 45 paper! I recently found a few sheets from the Botanicabella Collection in my paper stash. I decided to create an altered notebook with the pages that I had.

Here is a picture of the completed notebook cover.

Supplies used in this project:
  • (2)-12x12 sheets of Graphic 45's Botanicabella Collection Botanicabella #4500045
  • (1)-12x12 sheet of Graphic 45's Botanicabella Collection Ode to a Butterfly #4500053
  • Golden yellow cardstock 
  • (1) 8.5x11" shimmery white cardstock
  • Composition Notebook
  • Adhesive for book making and paper ( I used Glue Arts High Tac and Perma Tac)
  • 1/8" pop dots
  • sharp scissors
  • Wild Honey Tim Holtz Distress Ink
  • Ink distressing tool
  • Red gems in 2 sizes
  • scotch tape
  • metallic thread
  • Heritage Corner punch from Fiskers
  • Zots for Bling
  • craft knife
  • bone folder
  • ruler
  • other embellishments
 Directions-

-Using High Tac or other book making adhesive (Mod Podge for example), outline the edges of the cover of the Composition notebook. NOTE: Do not cover the black spine with adhesive.


-Center one (1) sheet of the Botanicabella 12x12 paper over the adhesive so that the edge abuts the black spine so that the red with gold design is facing up.


-Smooth paper down on the top of the notebook

-Trim the over hang along the width of the notebook leaving about 1" on paper past the edge of the cover.


-Take the bone folder and placing the notebook on it's cover run the bone folder around the edge of the cover. This creates a crease line-making the next step so much easier. 

-Fold the paper over the edge of the cover on one of the short sides and the long side. Place the ruler on an angle that connects the inner and outer corner of the folded paper. Using the craft knife cut along the edge of the ruler. Be careful not to cut through the cover. Remove extra paper and adhere the flaps to the cover. Repeat process on the other corner.

-Repeat this entire process for the back cover using the second piece of Botanicabella.

-Cut two pieces of golden yellow cardstock to fit within the cover of the notebook (if using a smaller or larger notebook than the standard composition notebook, cut the cardstock so that it rests 1/8" in from the long and short sides of the cover.) These inside pieces measure 9.5x6.75"

-Using the Wild Honey distress ink ink the golden yellow cardstock around the edges and adhere to the inside of the back cover.

-Create a pocket on the liner for the cover by placing the back side of Ode to a Butterfly on an angle across the liner. Using the corner covering process from above to adhere the pocket to the liner. Using scraps from the Botanicabella cardstock cut a strip of butterflies and adhere as a pocket edge and wrap around the back of the liner.

-Adhere liner to the inside of the front cover.

-Cut a piece of the the white shimmery cardstock to 3.5x5" Using the Heritage punch, cut all four corners of the cardstock

-Distress with Wild Honey ink and apply title (I used a "Dream" rub-on)

-Thread clock face embellishment (or embellishment of choice) on to the metallic thread. Using the cheater method attach the thread to the title block.

-From the paper scraps of the Botanicabella paper cut out seven butterflies. Create dementional butterflies by using pop dots to layer two of the butterflies together. Adhere two of the butterflies to the front cover around the title.

-Attach one to the center of the pocket liner on the inside cover. Attach the last butterfly (flat) to the top right corner of the cover liner.

Attach the red gems to the bottom of the front cover as pictured.


Sunday, August 26, 2012

Blog Changes

Good Evening Everyone,

I have rearranged this blog's layout to include a link to my eBay store. If you look above this post at the headings under the blog tittle, you will see a tab labeled "Butterfly's eBay Store". This will bring you to the store were I have card making kits, and pre-made greeting cards available for purchase.

Thanks for stopping by my blog.

Friday, August 17, 2012

A Steampunk Morning

Good Morning!

It's finally Friday here in New Hampshire. I woke up this morning wanting to watch Return to Oz. If you  haven't seen this movie you should. It's a great 'what-if' movie. Anyway...

Last night was a great night at the Steamy Swan Society's first movie night event. We screened League of Extraordinary Gentlemen. The event was a hit! We had about twenty-five plus people and plenty of goodies including popcorn (a movie staple), warm brownies, cookies, soda, and mini pies. As a group, we look forward to having more events like this in the future. We are currently working on a Masquerade Ball, Victorian Tea, and a Murder Mystery Theater.

I'm so happy to find people in my area that are into the culture/genre that is Steampunk. So this post has some of my recent projects that incorporate aspects of the Steampunk world.

Steampunk is basically a what-if scenario. What if technology didn't progress the way it did? What-if everything was still powered by steam? This genre takes on properties of popular fiction during the mid 1800's through about 1910's. Julies Vern for example.

3D Mandala using Assorted papers and Embellishments
A paper pin for the Mystery Murder Event
A card for a time traveler (i.e. Birthday)
Love Graphic 45 paper
  Thanks for stopping by and reading. Have a great day!